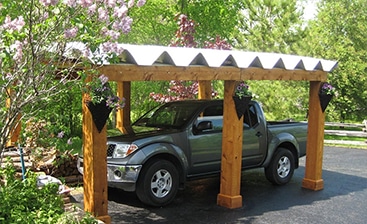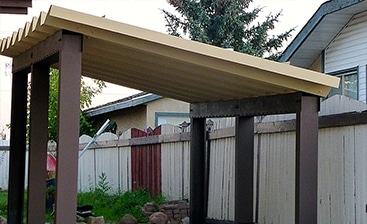

Are you considering purchasing a metal carport kit but are hesitant about the installation process? Fear not! This comprehensive guide will walk you through the necessary steps to install steel carport kits on your own. Whether you’re a seasoned DIY enthusiast or new to the world of self-assembly, this article has got you covered with easy-to-follow instructions.
Metal Carport Kit Installation Layout and Preparation
The first step in installing your steel carport kit is to plan the layout and prepare the site. This involves choosing the right location, clearing and levelling the area, and ensuring that you have all the necessary tools and equipment. Make sure to measure the space accurately to fit the carport dimensions and check for any utility lines or obstacles.
Metal Carport Footing
There are a variety of footing options available for your metal carport, each designed to provide stability and durability based on different ground conditions and carport sizes. Understanding these options is crucial to ensure that your carport stands firm and lasts long.
Standard Footing: The most prevalent type of footing for steel carport kits, the standard footing, involves digging holes at the designated spots where the posts of the carport will be installed. These holes are typically about two feet deep, but this can vary depending on local building codes and the height of your carport. Once dug, the holes are filled with concrete, and the metal posts are set into them. The concrete then hardens, anchoring the posts securely in place. This method is particularly effective for stable, firm soils and is known for its straightforward installation process and long-lasting stability.
Caisson Footing with Base Plate: Specifically designed for areas with softer or less stable soils, caisson footing with a base plate provides enhanced support. This method involves drilling or digging deeper into the ground to reach a more solid soil layer. The cylindrical footings, or caissons, are then filled with concrete, and a base plate is attached to the top. This plate helps distribute the weight of the carport evenly and provides a more stable base for the structure. It’s an excellent option for areas with sandy, clayey, or other types of soil that don’t provide adequate support for standard footings.
Spread Footing: This type of footing is typically used for larger carports or in areas where the load needs to be distributed over a larger surface area. Spread footing involves creating a wider base for each post, which can be achieved by enlarging the size of the hole and using more concrete. This method is particularly useful in areas with loose soil or for carports that will bear more weight, such as those intended to shelter multiple vehicles or heavier equipment. The wider footprint of the spread footing helps prevent the carport from sinking or tilting over time.
Metal Carport Kit Material List
Before commencing the installation of your steel carport kit, it’s imperative to ensure that you have a complete set of components as specified in your kit. A typical metal carport kit includes structural elements like posts, which form the primary framework, and roof panels, which are essential for the overhead coverage of your carport. Also crucial are purlins, which are the horizontal beams providing support to the roof panels, and braces, which add structural integrity to the entire setup. The kit should also contain all necessary fasteners, such as screws, which are crucial for securing different parts of the carport together. Additionally, it’s important to have the right tools on hand for assembly, which may include items like a drill, wrenches, a level, and a measuring tape. Before starting the installation, cross-check every item with the material list provided to ensure you’re not missing any components.
Metal Carport Post Caps
The installation of post caps is a significant step in erecting your metal carport. These caps play a dual role; primarily, they serve to shield the structure from moisture ingress, which is essential for maintaining the integrity of the posts over time. These caps are usually designed to complement the overall design and finish of the carport, enhancing its visual appearance. When installing the post caps, it is crucial to ensure they are securely fastened to the tops of the posts.
Attaching Purlins for Metal Carport
The process of attaching purlins is a critical step in ensuring the structural soundness of your steel carport. Purlins are the horizontal support beams that are crucial for holding up the roof panels. During installation, it’s important to align these purlins precisely with the frame’s posts. This alignment is crucial for the stability of the roof and, by extension, the entire carport. Once aligned, the purlins are secured in place with screws, necessitating careful attention to detail to ensure each purlin is firmly attached.
Metal Carport Roof Panels
Installing the roof panels is one of the most crucial steps in setting up your steel carport kit. These panels form the protective cover over your vehicle or stored items, shielding them from the elements. The installation process begins at one end of the carport, methodically working your way to the other end. Each panel must be overlapped as per the manufacturer’s guidelines to ensure a watertight seal and to maintain structural integrity. It’s important to ensure that these panels are securely fastened to the purlins beneath them. The fastening process typically involves using specially designed screws that resist weathering and can firmly hold the panels in place. Proper installation of the roof panels is critical to prevent leaks and to withstand weather conditions like wind, rain, and snow.
Metal Carport Trim
The application of trim to your metal carport is a final touch that serves both functional and aesthetic purposes. Trim pieces are typically applied along the edges and corners where the roof panels meet the frame or other panels. This not only gives the carport a polished and finished appearance but also plays a crucial role in sealing off these junctions to prevent water and debris from entering the structure. The trim should be carefully measured and cut to fit each specific area of the carport for a clean and precise fit. During installation, it is important to ensure that the trim is securely attached and properly aligned with the edges and corners for optimal effectiveness.
Get a Metal Carport Kit Designed Specifically for You
Now that you’re equipped with the knowledge of installing a metal carport kit, it’s time to choose the perfect one for your needs. Toro offers a wide range of carport kits designed to suit various requirements and preferences. Browse our selection and find the ideal carport kit for your space.
Remember, a DIY metal carport installation can be a rewarding project. However, if you feel unsure at any step, don’t hesitate to consult a professional. For more information or to make a purchase, contact us today.
Embark on your DIY journey with confidence, knowing you have the support and quality products from Toro. Your new metal carport awaits!


